Beginner's Guide
A beginner's guide to Escape from Duckov, covering base setup, your first expedition, important NPCs, and useful tips.
Escape from Duckov Beginner's Guide
I. Base Setup and Initial Quests
Difficulty Selection
- Changing Difficulty: You can change the game difficulty at any time by pressing the
Fkey at the table in your base. - Survival Difficulty: The difficulty chosen in the video, which offers a greater challenge.
Stash and Preparation
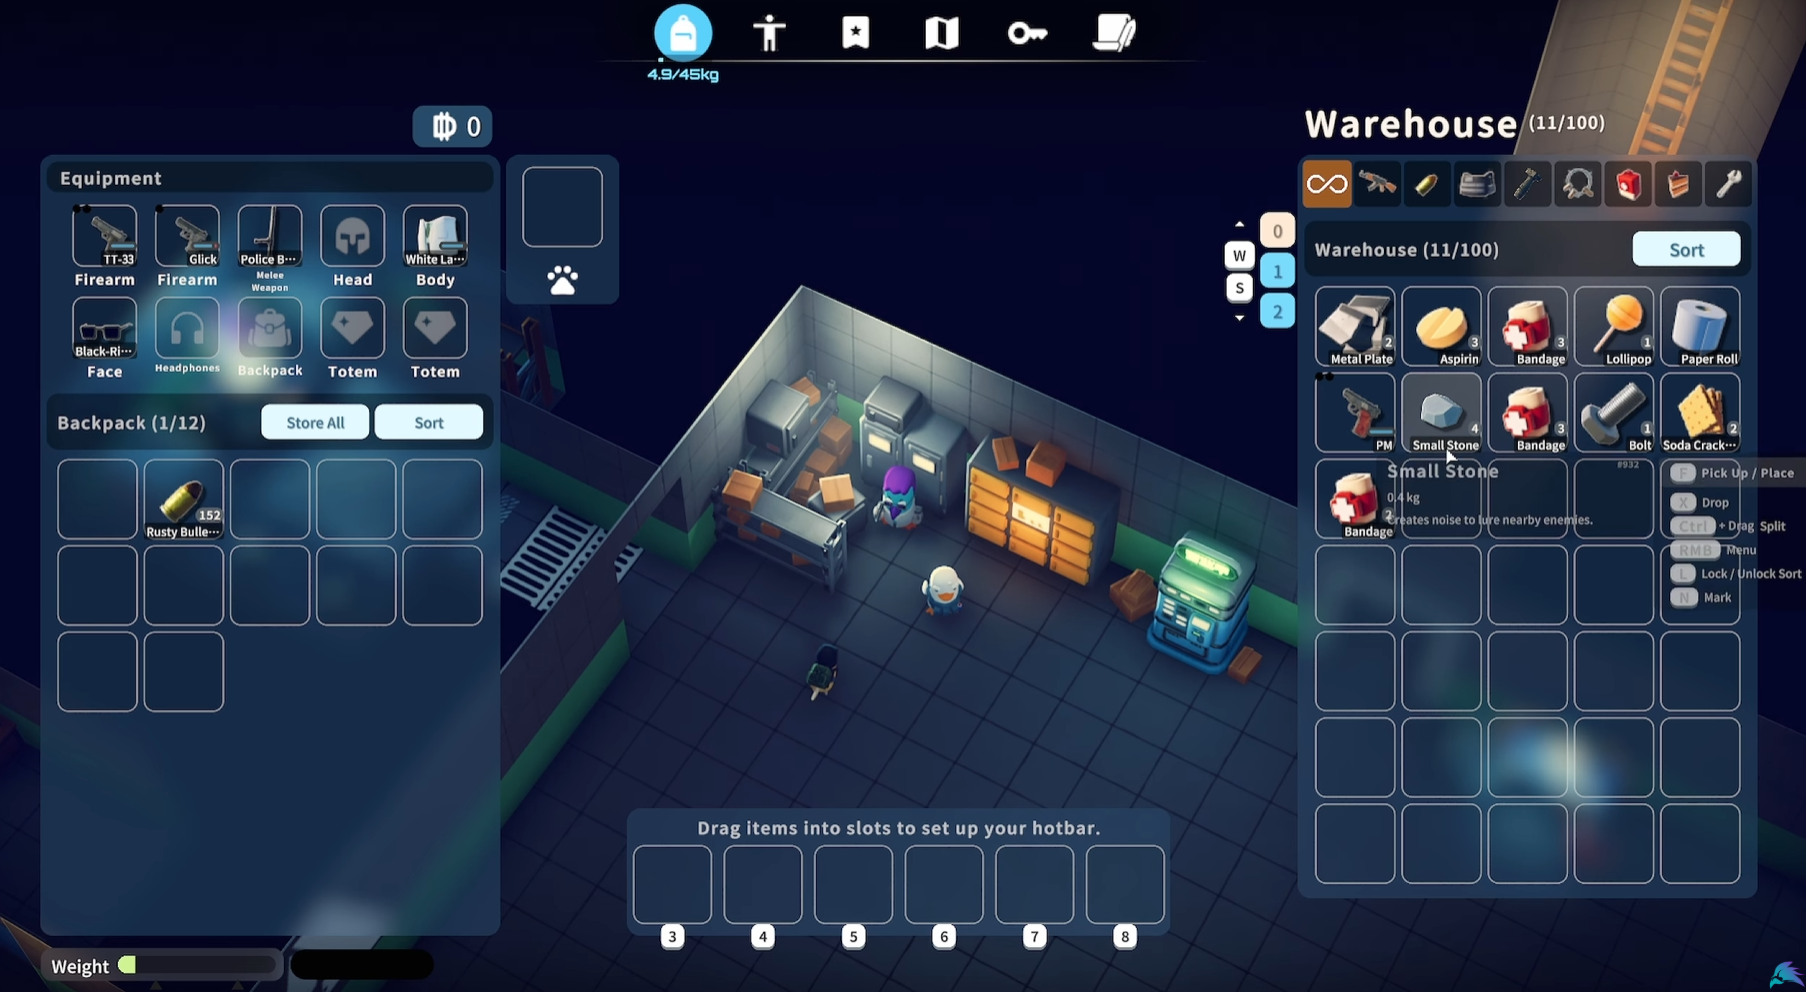
- Stash: Store all items you don't want to take out of the game.
- Locking Slots: Press the
Lkey to lock specific item slots, preventing them from being stored accidentally when using the "Store All" button. - Item Marking: In the crafting or quest interface, press the
Nkey on an item you need to mark it for easy identification while looting (a heart icon will appear next to the item).
Initial Quests
Talk to Jeff to accept quests:
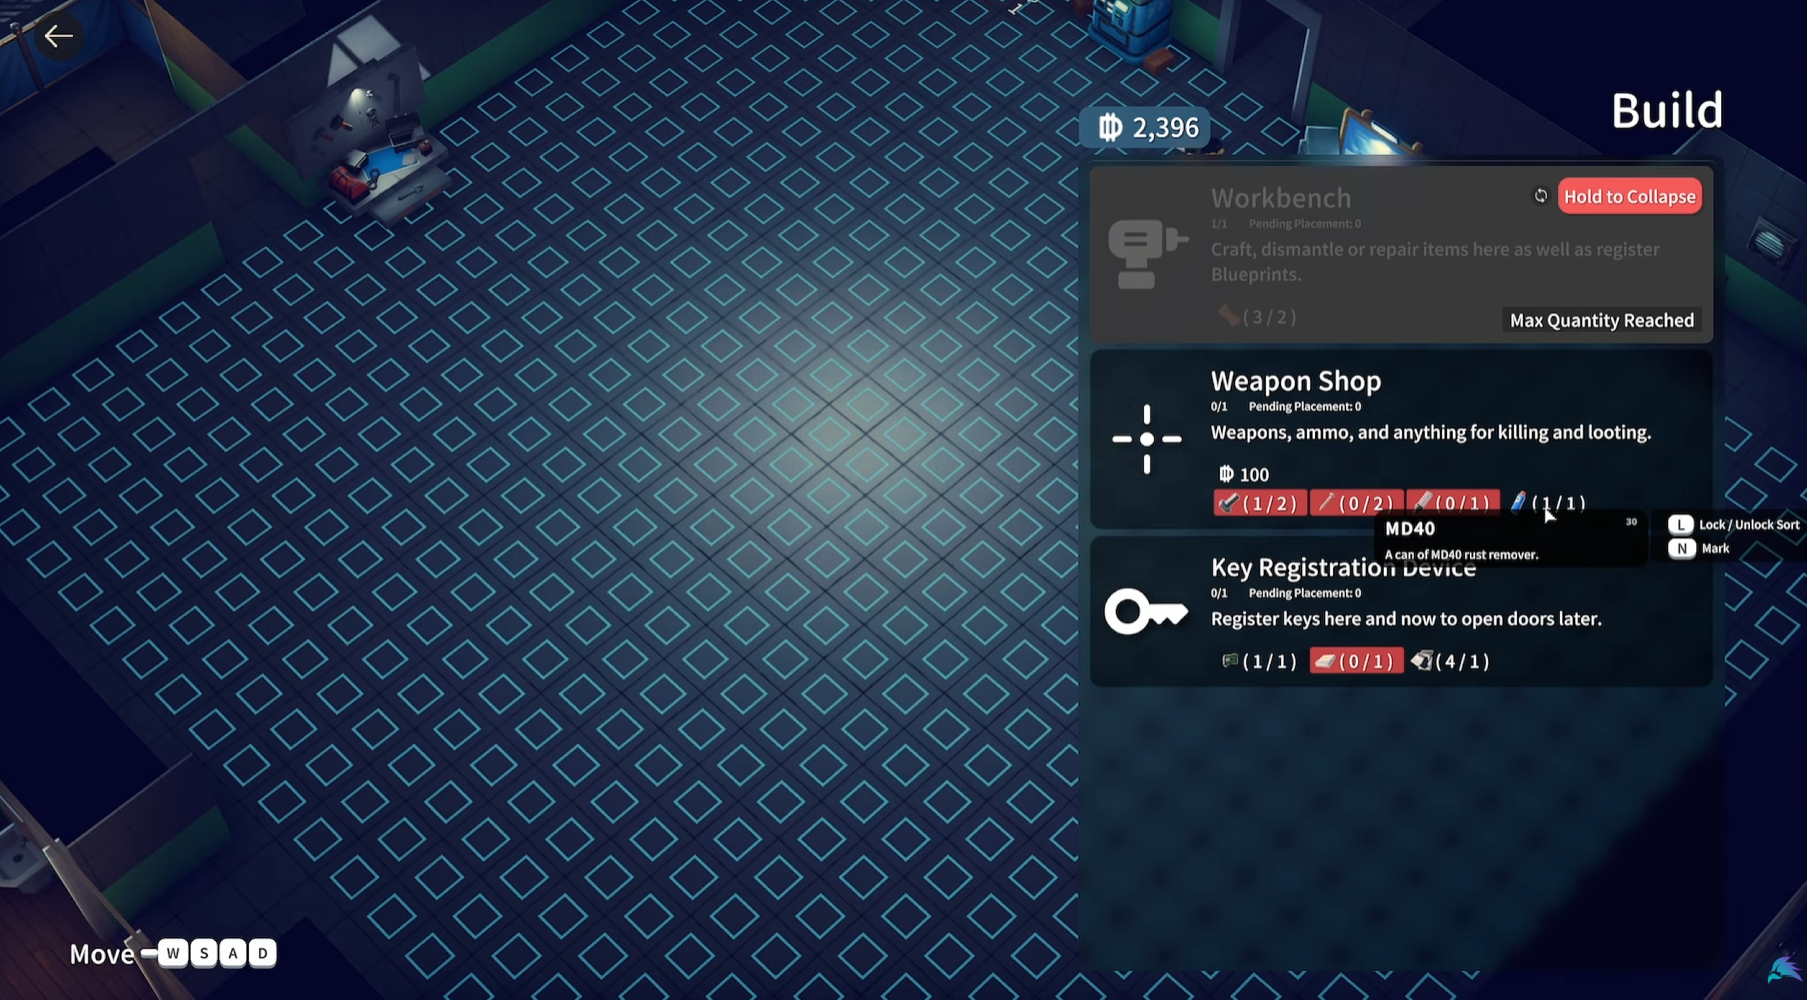
- Build a Workbench: Requires 2 Wood.
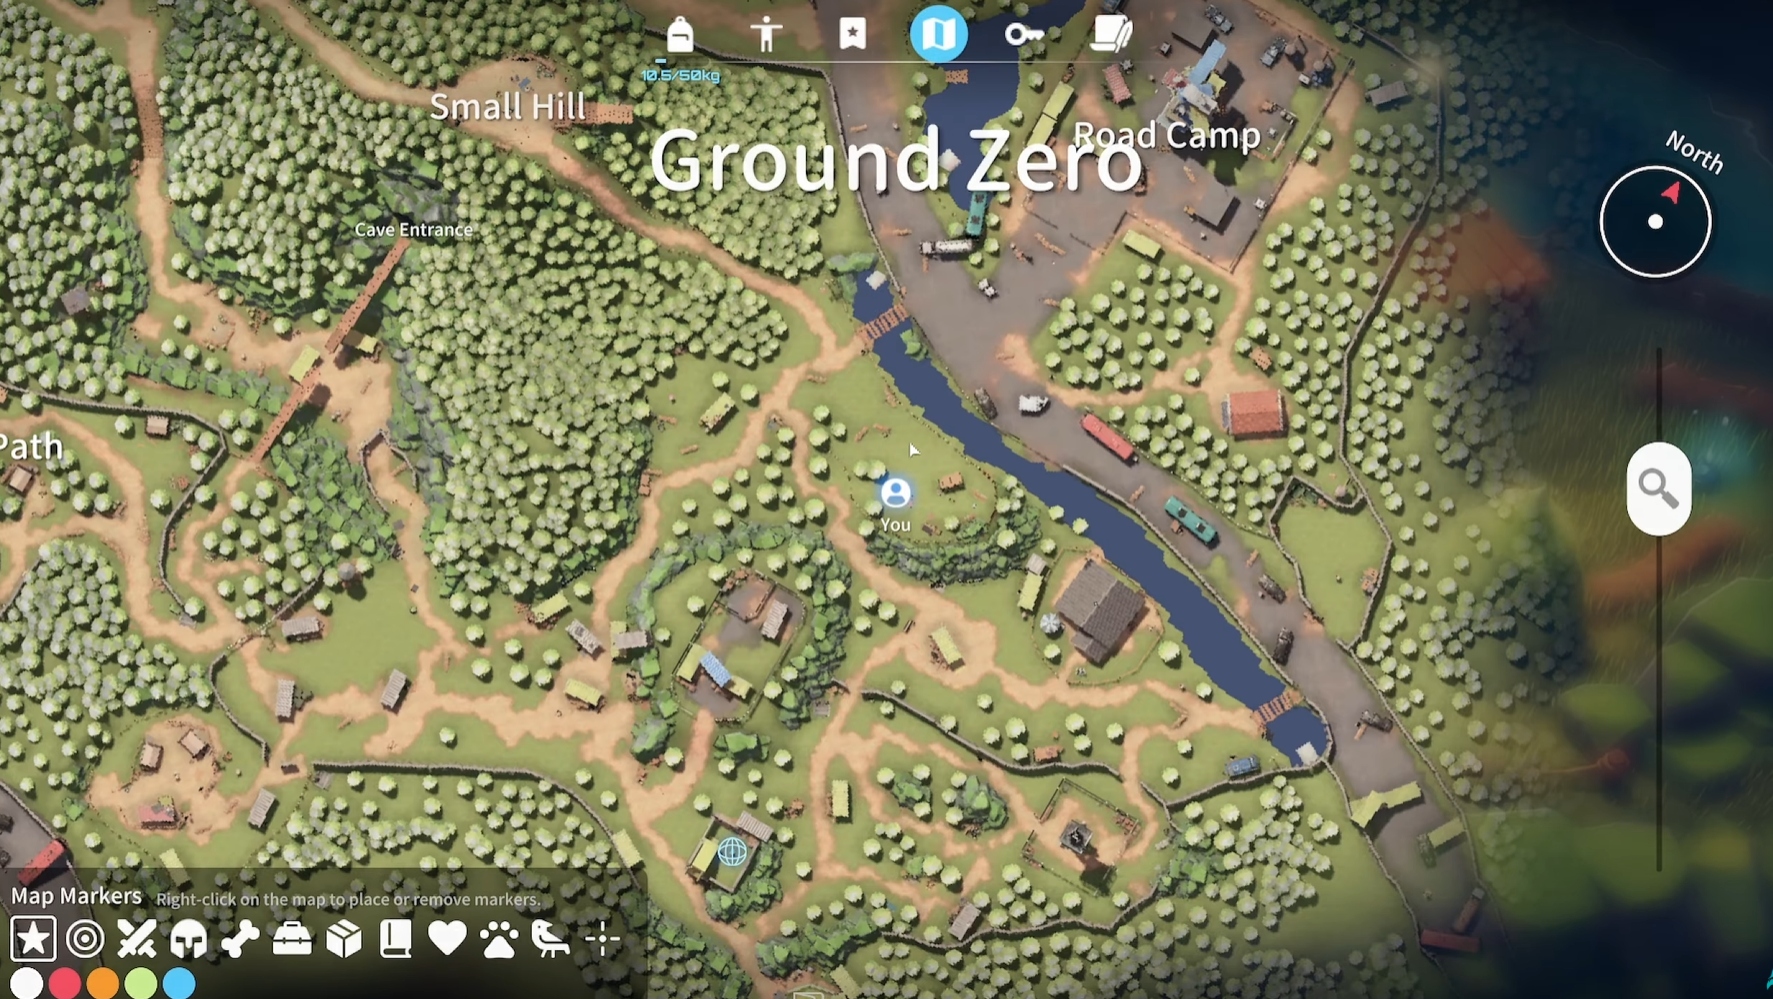
- Start-up Capital: Kill any enemy and successfully extract from the "Ground Zero" map.
II. First Expedition: Ground Zero
Looting and Survival
- Equipment: It is recommended to carry a Glick pistol due to its large ammo capacity. Make sure to set hotkeys for healing items like bandages and aspirin (e.g., set to
5). - Enemies: Watch out for Rampaging Scavengers, who are melee units with high damage. They will flash a red light when they swing their weapon, which you can dodge by rolling with the spacebar.
- Important Item Priority:
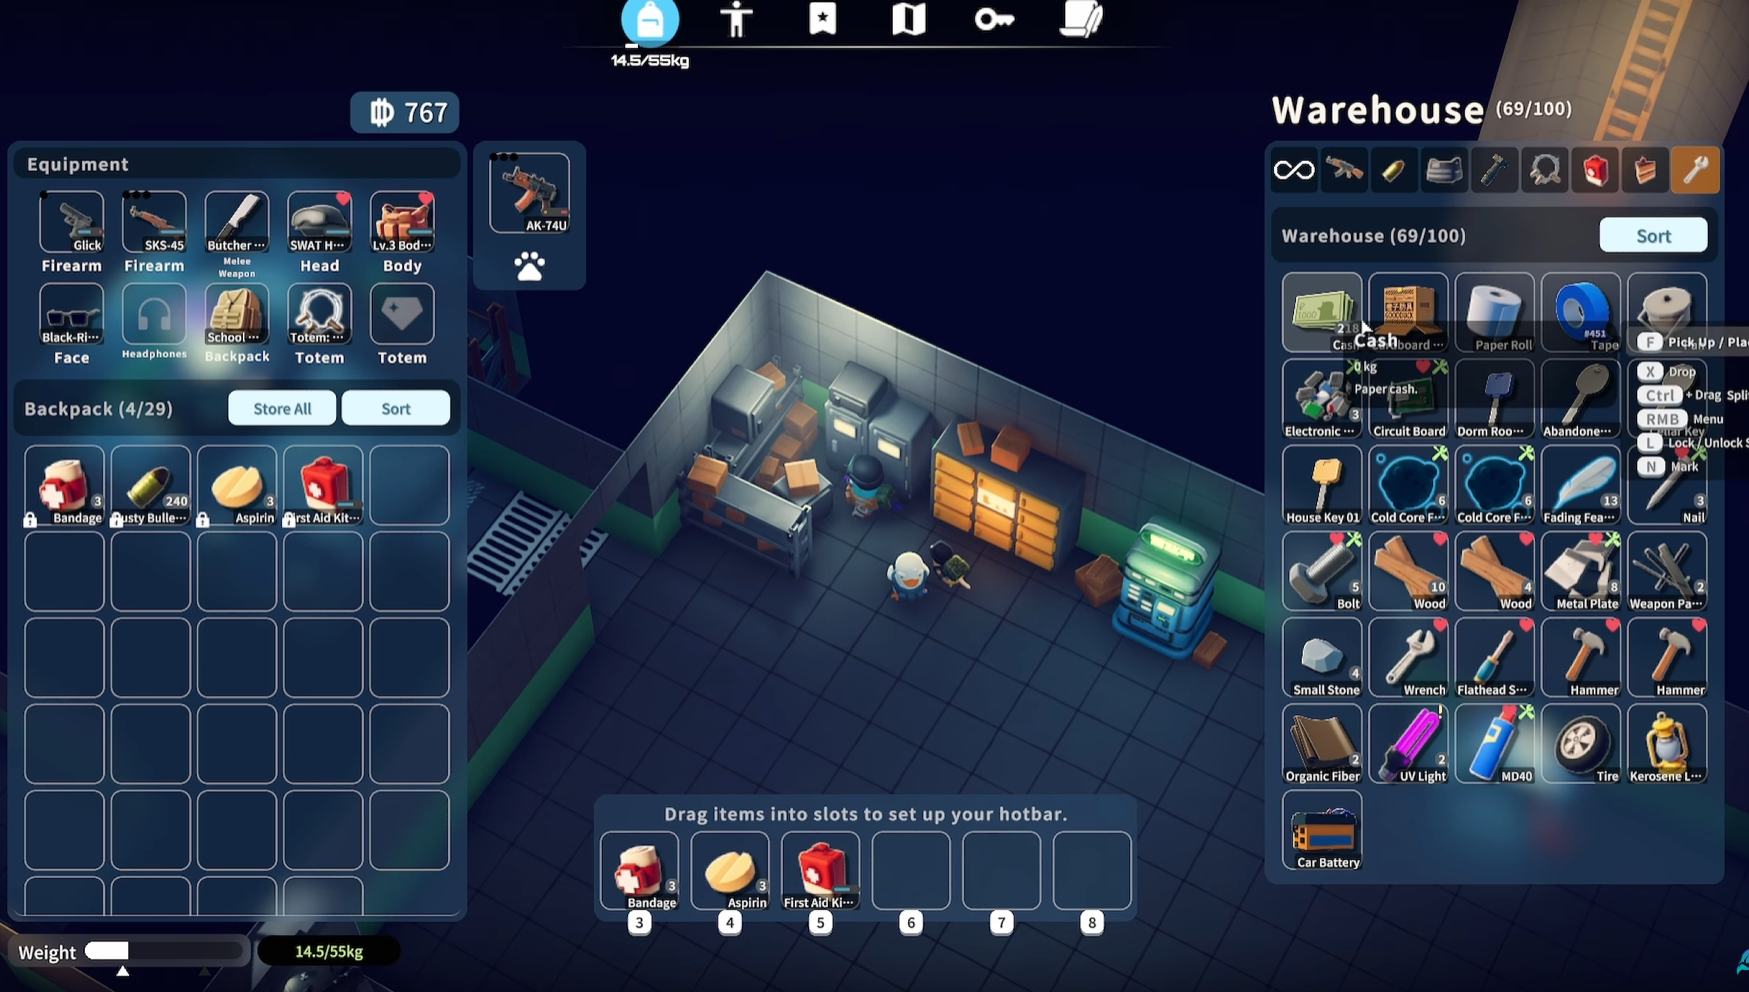
- Cash: A new item that can be used to trade with specific NPCs.
- Keys: Dorm Key and Cellar Key are very valuable.
- Circuit Board: Needed for an early quest (Key Registration Device).
- Herat: A hemostatic drug to prevent bleeding.
Extraction Tips
- In Ground Zero, you don't need to reach an extraction point on the map; simply return to the base entrance to extract safely.
- Tip: Return after looting enough items. Don't be greedy; you can enter and exit the instance frequently.
III. Base Upgrades and NPC Unlocks
Construction and Upgrades
- Workbench: Built with wood. Upgrade it as soon as possible to unlock more advanced functions and crafting recipes.
- Key Registration Device: Requires a circuit board, CD drive, etc. After registration, found keys will go into the device and do not need to be carried.
- Gym: Building it will unlock the Mud NPC.
[Insert Image: Workbench construction/upgrade interface (highlighting the N key marking)]
Knowledge and Tips
- Item Marking (N): Again, mark uncommon quest items.
- Handling Heavy Items: Heavy items like Car Batteries should be placed in the "Pet Slot" so they don't add to your weight.
- Perk Upgrades: Spend cash and core fragments to upgrade talents in the "Perk Palace." Prioritize skills that increase weight or space, such as Backpack Expert.
IV. Meeting Important NPCs
Gym Coach Mud
- Unlock: Appears after building the gym.
- Initial Quest: Requires 1 Duck Egg and Soda Crackers. Later requires cigarettes.
- Physical Training: Training in the gym can permanently increase attributes like health. Early training is free; later training requires food.
Mysterious Merchant
- Location: On the small hill in Ground Zero.
- Function: Buy quest items like honey, pens, and IV medicine with cash.
- Tip: When bringing cash into a raid, it is recommended to place it in the pet slot to prevent loss upon death.
Key Item Location Tips
- Honey Spawn Point: Near the beehive on top of the small hill in Ground Zero. It doesn't always spawn, but it's worth checking.
V. Later Expeditions and Base Expansion
Movement and Unlocks
- Fast Movement: Press the
Ckey to holster your weapon to run faster. - Unlock Sewer Entrance: Go to the road where you previously unlocked the bridge and remove the obstacle to open a new access to and from Ground Zero.
- Marking Quest (32:10): Purchase a Marker to mark the supply crate next to the campfire tent specified in the Armorer quest.
- Cave Unlock: Repair another bridge (requires metal and wood) to reach the cave mentioned in the fisherman's diary. Inside the cave, you can find data boxes, the Cube Gun recipe/weapon, etc.
- Fishing Notes: Records different fish that appear in different weather/times, which is knowledge for fishing.
- High Radiation Zone (Storm Contamination): Requires a JAB Level 3 certificate to enter.
Equipment and Crafting
- Armor Shop: After construction, you can buy better armor and helmets (like the SWAT Helmet), significantly increasing early survival rate.
- Tech Center: Requires a Power Cord and Nuts. After unlocking, a new NPC will offer quests.
- Blueprint Registration: Immediately register found blueprints at the "Blueprint Research" station to free up warehouse space and prevent duplicate pickups.
- Repair Bench: Unlocked after upgrading the workbench to Advanced Processing. Allows you to repair damaged weapons obtained from scavengers, such as the AK-74U.
Key Tip: Fast Travel
- Unlock Teleport Bubble: Find a Dynamite and detonate it on the broken wall outside the base entrance.
- Effect: This will open a shortcut, allowing you to instantly travel between the two ends of the map through the "bubble," greatly improving the efficiency of extraction and retrieving your corpse after death.

VI. Advanced Combat and Revival
- Headshots: Some quests (like killing scavengers) require headshots to count.
- Big Boy: A powerful boss in Ground Zero. Avoid engaging him when you are not well-equipped in the early game.
- Death Penalty: You will lose all carried items upon death. If you die again, you will permanently lose the corpse bag left from your previous death.
- Corpse Recovery: Return to your corpse's location as soon as possible after death to recover your items. Unlocking the teleport bubble (Dynamite) is key to ensuring a quick recovery.
Core Advice: Make full use of the base facilities, prioritize unlocking the armor shop and repair function, invest in the Backpack Expert perk, and open the teleport bubble as soon as possible. Good luck on your escape from Duckov!